If you’re a longtime reader (thank you!) you know we’ve been planning to add shade sails to the backyard for a while. Even though the back of our house faces north, we’ve discovered that a high summer sun reaches the deck and heats up the space pretty quickly. The Trex composite gets super hot in direct sunlight, and if you’ve learned anything from this blog it’s that I’m barefoot 95% of the time as is the rest of my family. Smokin’ deck + naked feet = no bueno. Not only that, we knew shade would help make the air feel cooler, too. (In fact, up to 15º cooler! Did you know that?) It seemed like a shame to have this great outdoor space but not feel comfortable in it during prime deck season.
We considered a modern pergola (similar to this) or a retractable awning (similar to this) or even a combination of the two (something like this) but ultimately settled on shade sails because we thought they’d look better on our squatty ranch, cost less and require less maintenance. Plus, we’ve always liked them everywhere we’ve seen them. They feel a little less rigid and have more of a playful design.
A few friends and readers suggested checking out Costco’s shade sails and we did (along with other ready-to-hang versions from other retailers). But after considering our needs and what we were hoping to accomplish, we decided larger, custom sails with robust hardware would be the best option for us. We had a local company (Miami Valley Shade Sales if you’re local) come out last year to give us a free estimate. We had sticker shock over the $4,130 price that was quoted to us for two sails plus installation. (!) That’s when we started researching a full or partial DIY installation. Still, the estimate proved to be extremely beneficial. The company took measurements and gave us recommendations for the overall design, post placement and sail shape/height.
Steve gets all the credit for this project. My only input was on the sail design and lending an extra pair of hands to set the posts. He researched the hardware, posts and sails. He’s an engineer, so this project was right in his wheelhouse. Stuff like this is fun for him. Being married to an engineer has its perks.
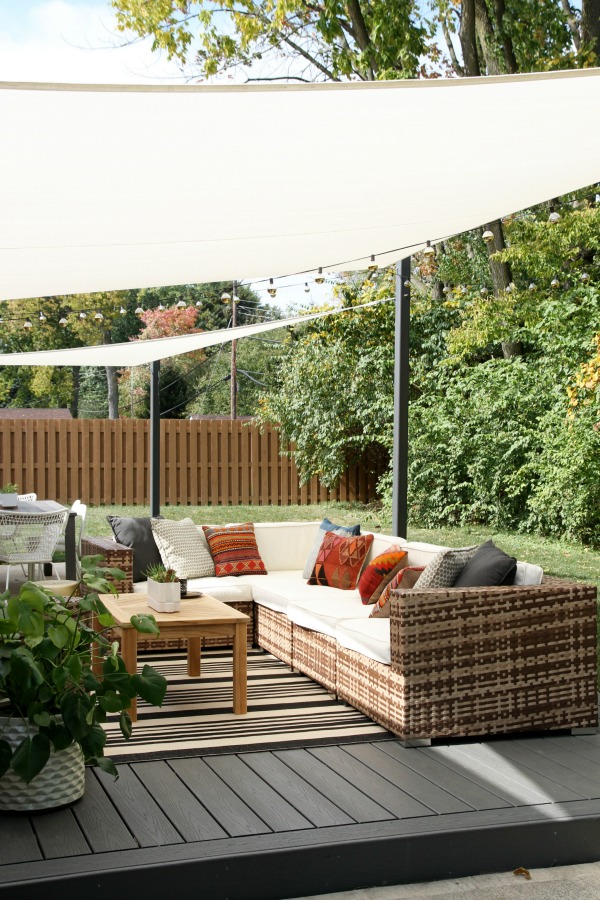
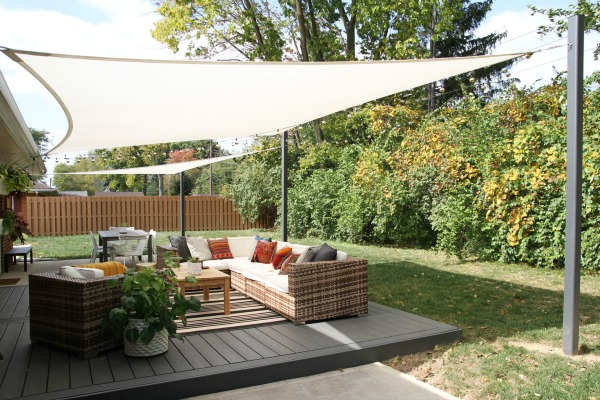
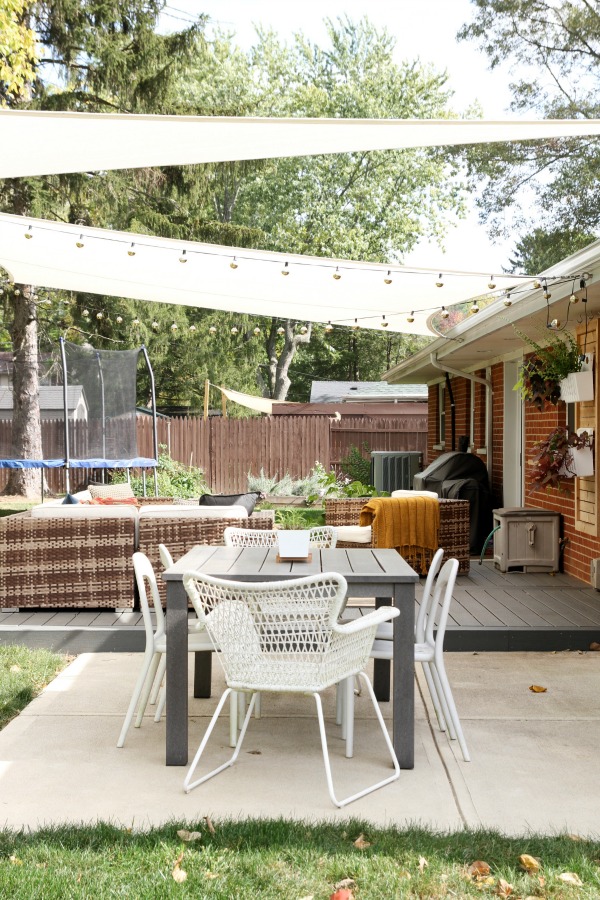
We ended up with a large rectangular sail above the deck and a smaller triangular sail above the dining patio. In the early stages of planning, we thought we’d do three sails (a large rectangle and two smaller triangles overlapping the patio) but when we started mapping things out three sails felt a little crowded in our modest yard. We figured we could always add a sail, so we decided to do two sails and see how we liked them before investing in a third.
Our setup posed a few challenges because we were pretty much forced to tie in all the sails to the fascia of the house. You can add a mounting post to the roof that sits higher, but since we have a vaulted ceiling inside it would’ve involved tearing into that which sounded like a terrible idea to us. Instead, we installed two adjacent corners of the rectangle sail at the same height off the eave and slanted the sail upwards toward the backyard/north. We weren’t able to twist it into a parabola as is most commonly done.
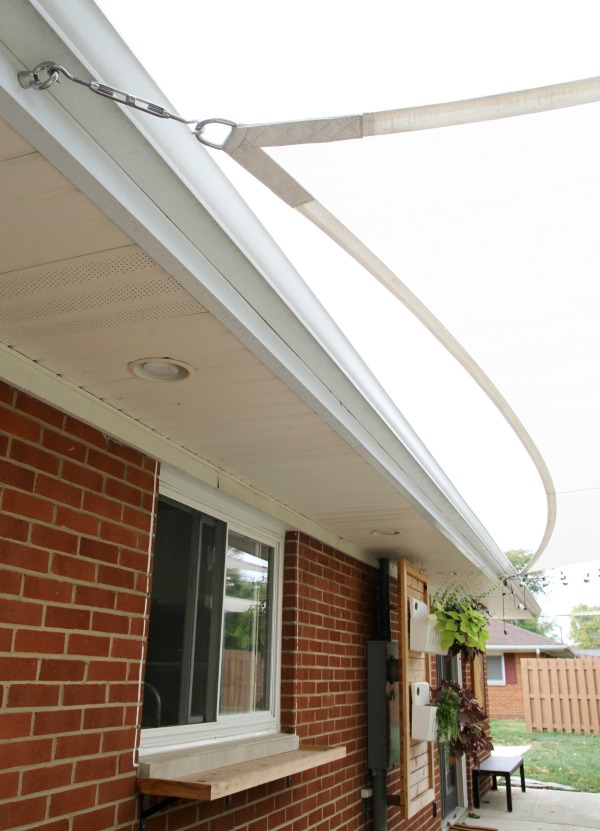
The deck sail is anchored to the eave by two heavy duty rings. We purchased the hardware for the house (eye bolts, eye nuts, rafter brackets) from Shazeebo and actually installed it last year. (See more here and how awesome is that company name, Shazeebo?! It’s my new favorite word.) This required pulling down sections of soffit, drilling holes through the fascia and then bolting the rafter brackets to the rafters. There wasn’t a ton of room to work with at the end of the rafters, so Steve used a 90º drill and ratchet set to tighten everything down.
The posts are actually three 4″ x 4″ steel square tubes with .313 thickness. The two nearest the deck are 14′ long and the one off the corner of the dining patio is 12′ long. Steve bought them locally from Industrial Tube & Steel in West Chester, Ohio, the cheapest source he could find. We had to borrow my dad’s trailer to pick them up. They were HEAVY! Steve laid the posts up on sawhorses in the garage (who are these people who actually park cars in their garage?!) over the winter last year and gave them three coats of paint. He used paint leftover from painting all the exterior doors. It’s ‘evening hush’ mixed in the Behr ultra premium plus exterior enamel line in a satin finish.
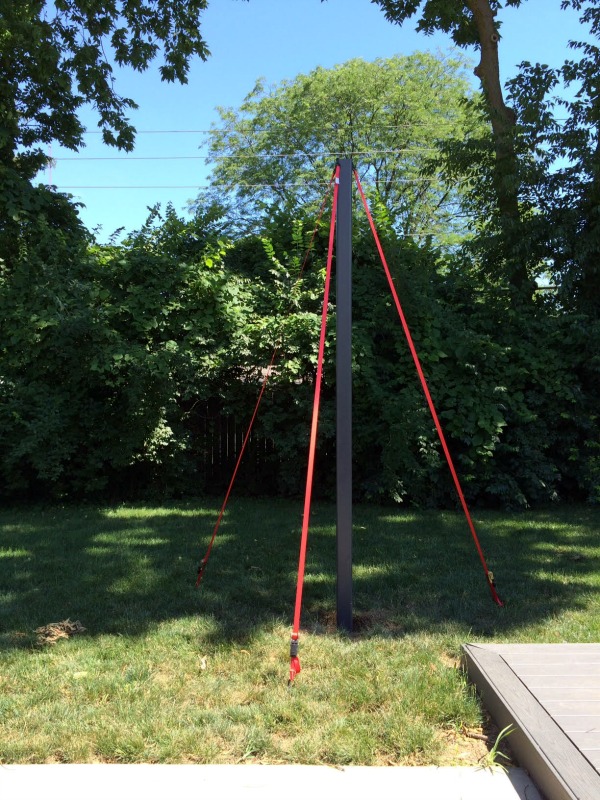
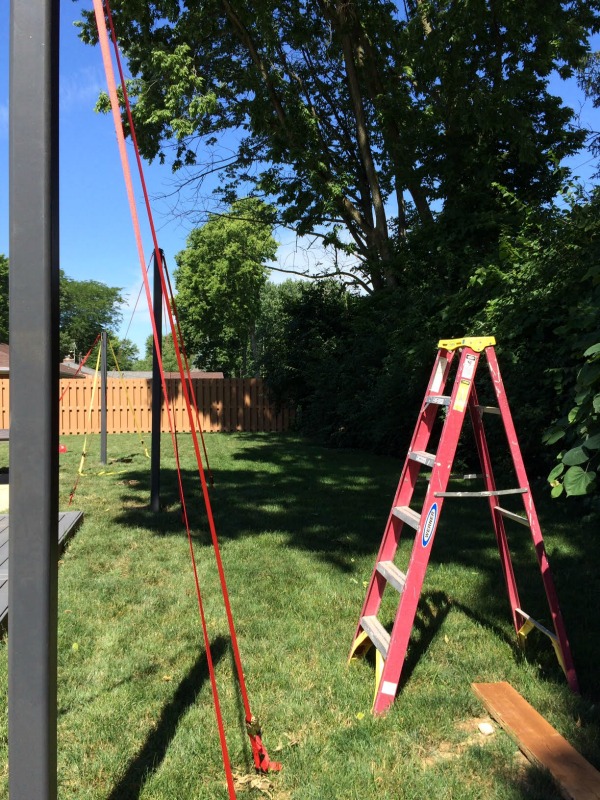
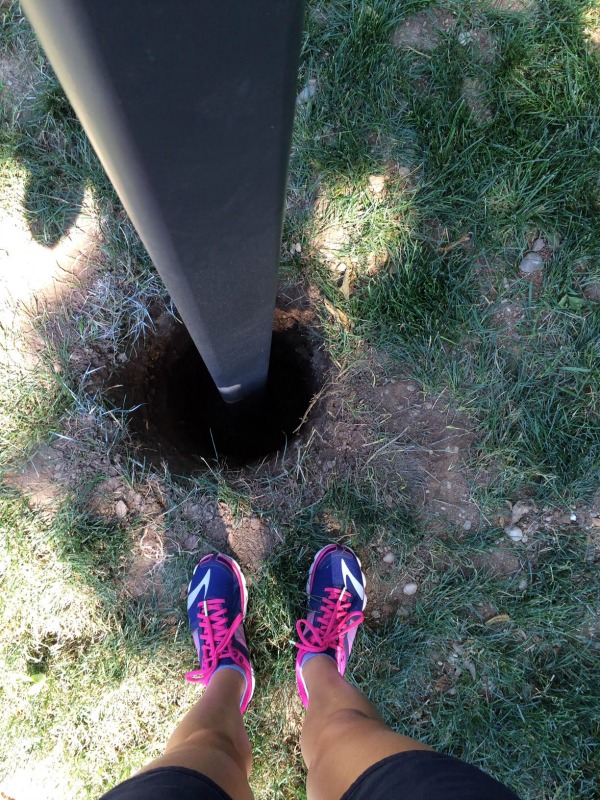
Earlier this summer we rented a one-man auger to dig the holes and Steve’s quote, not mine, “It was a pain in the ass.” It was obvious it was an older model. A newer one probably would have worked better, but the one we rented was tired. Steve ended up hand digging most of the holes. The powers that be suggested burying the post 1′ for every 2′ above ground. We didn’t get quite that deep, but it’s close and the posts are well below the freeze line. It was also recommended to set the posts a half bubble off vertically due to tension, even for steel tubing. The posts will bow a bit once sails are hung.
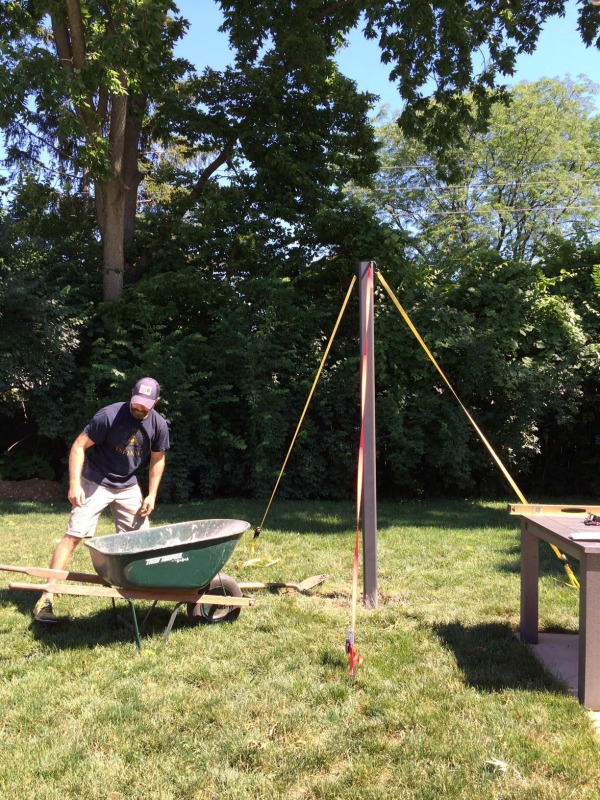
We worked together to carry and set the posts. They were super HEAVY!! We probably could/should have had more hands on deck, but once we start something we’ll do just about anything to finish it ourselves…including break our backs. There was a lot of shimmying and tweaking and checking the level to get the posts set just right. Once we had a post where we wanted it, I made like a statue holding it in place while Steve hooked ratchet straps to the top of the post and secured them to stakes in the ground. When all three posts were up, Steve poured the concrete and let it set. Then he drilled holes at the tops of the posts at pre-determined heights and added the eye bolts and eye nuts. Lastly, he installed square snap-in caps to the tops of the posts to prevent them from filling with rain.
Our backyard was wide and shallow to begin with, so we don’t feel like we sacrificed all that much yard space by setting the posts. Other than jumping on the trampoline, the kids mostly play and run in the front yard which is much larger.
FYI – During our post-setting efforts I failed to snap a pic of the tops of the posts, but here’s a shot I took just this (rainy) morning.
Once the posts were set, we measured for and ordered the custom sails from Sail Shade World (totally unsolicited) based on cost, quality and customer reviews. If shade sails are something you’re considering, keep in mind you cannot order custom sails until after your posts and anchor points are set. It’s critical to get accurate measurements with the posts and anchors in place. Otherwise, you could end up with sagging sails or sails that are too taut. Both scenarios compromise the stability of the sail. Sail Shade World has extremely thorough instructions on how to take proper measurements. We measured everything probably five times to make sure we were doing it correctly.
The sails are top of the line as far as quality goes. We selected premium commercial grade 340 g/m² fabric in the natural color for each sail. The heavy duty, maintenance-free fabric has a 10-year warranty against UV-degradation, provides up to 98.8% UV protection and doesn’t hold water. Thick, double-stitched seatbelt webbing along the perimeter and at seams prevents fraying. Marine grade stainless steel rings are stitched into the corners of each sail. The superior fabric and corner rings are what sold us. A few of our neighbors have store bought shade sails less than a year old that are already faded, fraying and sagging. We wanted our shades to last more than one season. Steve even contacted the fabric manufacturer to ask more questions about the hardiness of the sails before we justified the extra cost.
Installation was fairly simple. The sails come with tags so you can correlate them with your measurements. We did have a thread galling issue with the provided turnbuckles. Basically, they quit turning before the proper tension was achieved. Steve contacted Shade Sail World and explained the problem. They were empathetic and reimbursed us for the hardware which allowed us to order heavier gauge turnbuckles from Amazon. The 5/16″ turnbuckles worked great. We’d highly recommend them for a larger sail, especially if the sail will be removed each winter (as ours will).
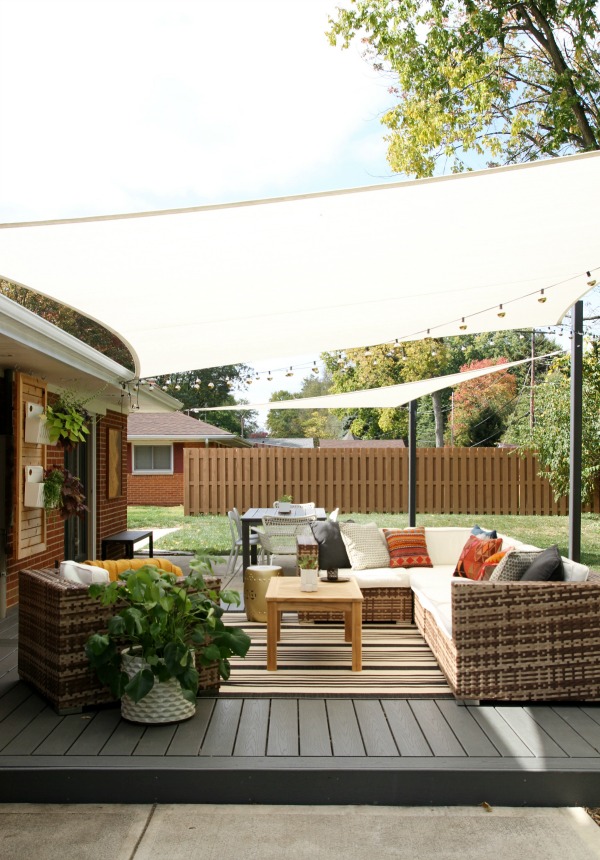
Even though this project spanned a few years from conception to execution, we’re super happy with the results. So far, the sails have held up beautifully. We’ve had several severe storms blow through already and the sails still look brand-new. No fraying, no fading. The outdoor furniture under the sails does get wet when it rains. The sails are purely for shade cover. We’ve been removing the cushions before wet weather strikes for years, so this is nothing new for us. We aren’t sold on a third sail, so we’ll probably live happily ever after with two sails.
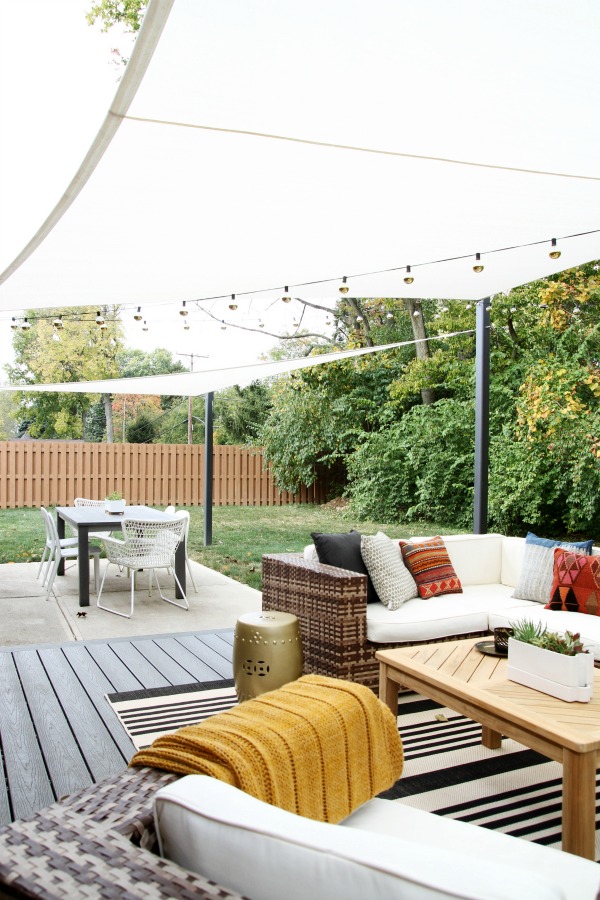
We’ve spent more time on the deck in the last two months than we have over the last two or three years combined. If the weather allows, we’re out there. (In fact, Everett has been choosing to do his homework and eat his afterschool snack on the deck.) It feels like an extension of our home and the sails provide a cozy ceiling effect that we weren’t expecting but love so much. For several months out of the year, we gain another room! #sonotreadyforwinter
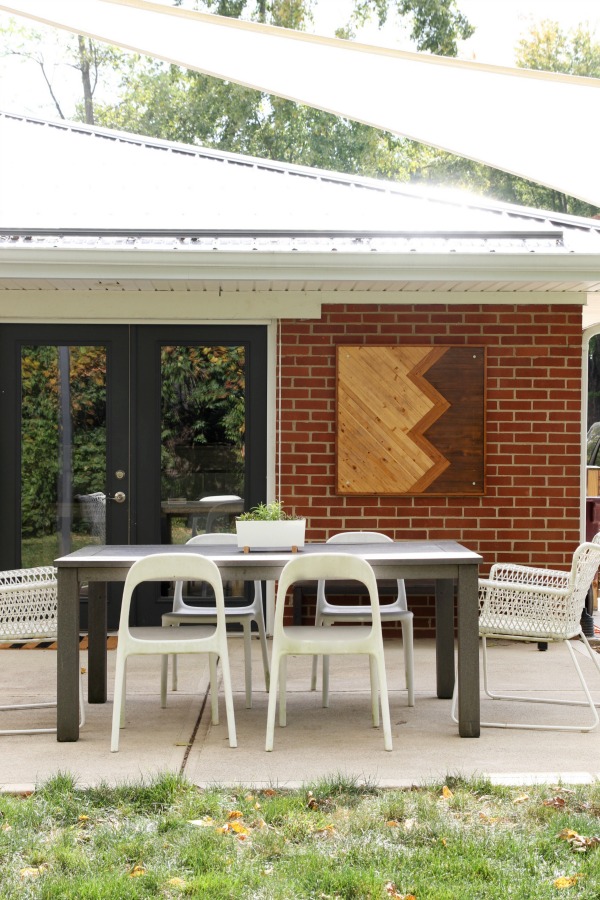
I wasn’t sure how I would like the slanted vs. twisted rectangular sail, but it’s not as terrible as I thought it might be. It kind of reminds me of a mini amphitheater the way it opens up to the backyard. It keeps the sight lines from the kitchen window nice and open, so I like that. The triangular sail twists down at the western most corner. This is by design. We mostly use the dining patio for al fresco dinners, and the setting sun used to blind us. Now, the slightest dip in the shade sail makes for a squint-free dining experience.
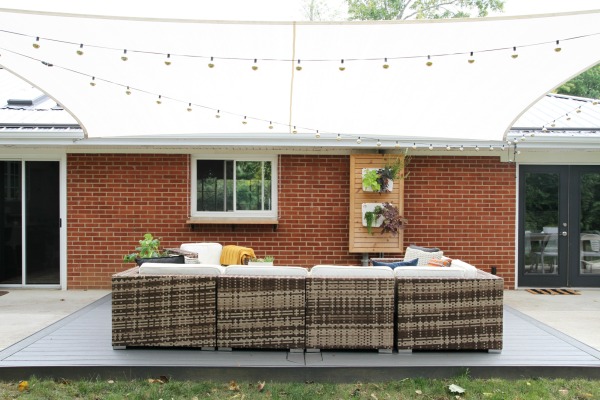
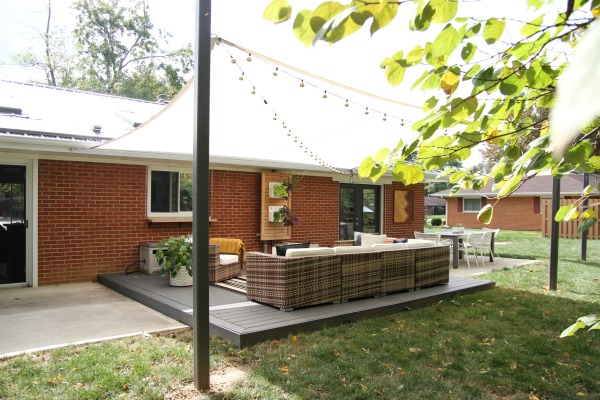
If you promise not to judge, I’ll show you a view from the opposite angle…
I wish I could snap my fingers and make the hose reel, bulky grill, AC unit and giant purple trampoline (affectionately referred to as Prince Dos) disappear for this shot, but the truth is they’re all things we use on a regular basis so I’d never want to live without them – even though our backyard would look way less cluttered without them. Maybe an AC enclosure is in our future? Or a built-in grill? As long as Prince Dos wears out my kids, he stays. I still wish the neighbor’s fence was charcoal or black. I haven’t had the guts to ask them if I can repaint the side facing our yard like many of you suggested. Oh, can you spy the store bought sail next door?
Now for a cost breakdown:
house hardware – $295
steel posts – $483
post caps – $30
auger rental – $0 (our rental fee was refunded since the auger didn’t work properly)
250″ x 185″ rectangular shade sail – $840
140″ x 195″ x 260″ triangular shade sail – $440
turnbuckles – $100
concrete – $150
TOTAL: $2,338
While definitely not a drop in the bucket, we saved nearly 2K by doing it ourselves. It helps that we broke up our purchases over a two-year period. We like to think of it as the cheapest two-room addition ;)
You may have noticed a few changes to the deck area. I’ll be addressing those in my next post! Stay tuned.
P.S. – Read about how the outdoor furniture is holding up and other backyard adventures here. See our DIY electric meter screen here. Still lovin’ those Woolly Pocket planters.
images: Dana Miller for House*Tweaking


DIY, renovation