After careful consideration {and lots of encouragement from you guys!}, we decided to keep the original front door. We like the midcentury style and it “fits” the house well. The door itself was in good shape – it’s solid wood and heavy, heavy, HEAVY. The only thing that had us scratching our heads was the hardware. There was a regular knob and then a separate deadbolt that wrapped around the side of the door that could only be unlocked from the inside of the house with a key. It was inconvenient to say the least and probably a fire hazard. I’m guessing it helped ease the worries of the single elderly lady who lived here previously.
Because we added insulation to the exterior walls and engineered flooring inside the door, we had to address the jamb and threshold. We lived with a sizable gap {think 2″} at the bottom of the door for a year and a half. I stuffed a beach towel in the gap to keep leaves, moisture and rodents out. If it weren’t for the neighbors’ cats, I’m pretty sure we should have had a mouse or two in the house last winter. The UPS man quickly learned to leave our packages outside the picture window. Sometimes, he even handed them to me through the window on days when I had it open. The entire front door debacle was embarrassing.
We aren’t quite finished with it yet but the door is functional now! You should have seen the UPS man’s face when I opened the front door to greet him this week as he was leaving a package outside our window.
“Our door opens now!” I announced, probably a little too excitedly.
He didn’t say anything – just looked at me and smiled. It was the smile you give crazy people. He was thinking, “Good for you, ma’am. Isn’t that what a door is supposed to do?” or “About damn time.”

I’m not going to bore you with the minute details but I’ll try to summarize. We ditched the clanging screen door and textured plastic inserts in the three square windows. HH fixed the jamb, installed a new threshold, cut the door down, added trim {inside and out}, installed a complicated mortise entry set, filled holes with wood epoxy paste and then sanded the entire thing down – door, jamb and all. {The concrete pad is also new; we hired out for that last fall.} And what took me two sentences to explain took about a month to complete working around the weather, family life and HH’s day job.

All that’s left to do is add weather stripping and paint. Please forgive the messy sidewalk and landscaping. We had a strong storm blow through last night and I haven’t touched a single fallen leaf. And, yes, beggar’s night was last night. I have no pictures of my kids dressed up because they just looked like kids in coats with weird pants on braving a hurricane while carrying bags of candy. Then we lost power. ON HALLOWEEN NIGHT. How’s that for spooky? So all-in-all, it was pretty much the weirdest Halloween ever.
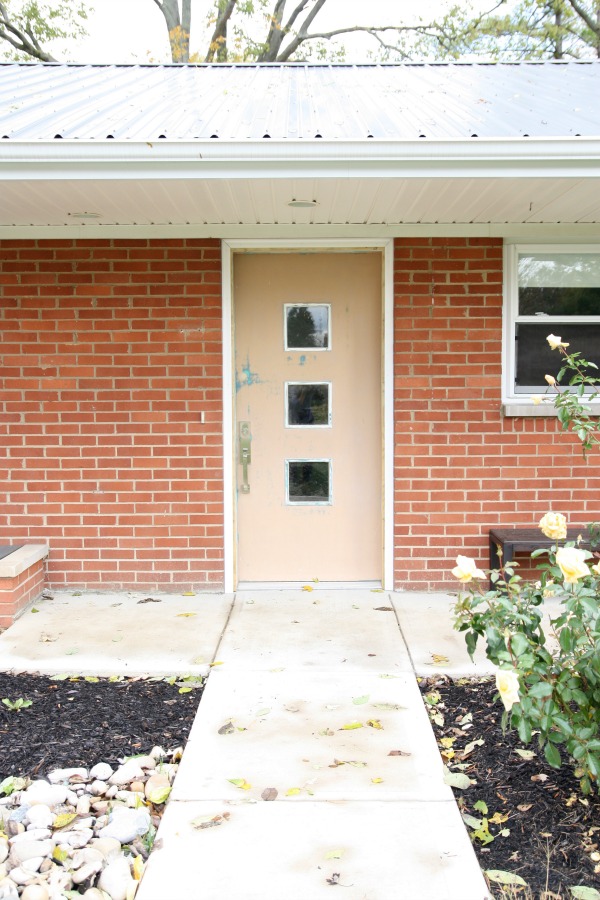
The light fixture in the before picture is gone. Our electrician-in-law added recessed lighting in the eaves overhang during renovation. That space to the left of the front door is screaming for house numbers, no?

I’m in love with the new entry set. Mostly because it works but also because it’s chunky and simple. We didn’t want anything that would take away from the door’s design. After sanding, it was kind of fun discovering the past lives of our door. It’s been beige, blue and blue-green. Methinks it wants to try a happy mustard.
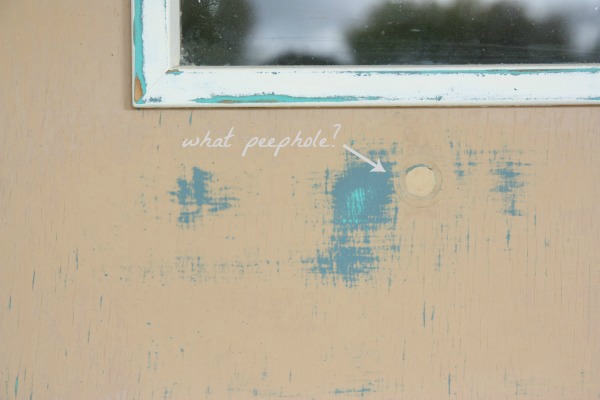
What does every door with three windows need? Why, a peephole of course. HH and I were rolling over this one. Honestly, we hadn’t paid that much attention to the door before so we were baffled when we realized we had a peephole this whole time. We couldn’t figure it out. Then I remembered that there had once been yellow textured plastic inserts covering the windows from the inside. I’m guessing for privacy? It certainly couldn’t have been for aesthetics. At some point a peephole was added to the door to see out. We removed the inserts a long time ago and have no need for a peephole so HH removed the peephole and filled the remaining hole with wood epoxy paste. What peephole?
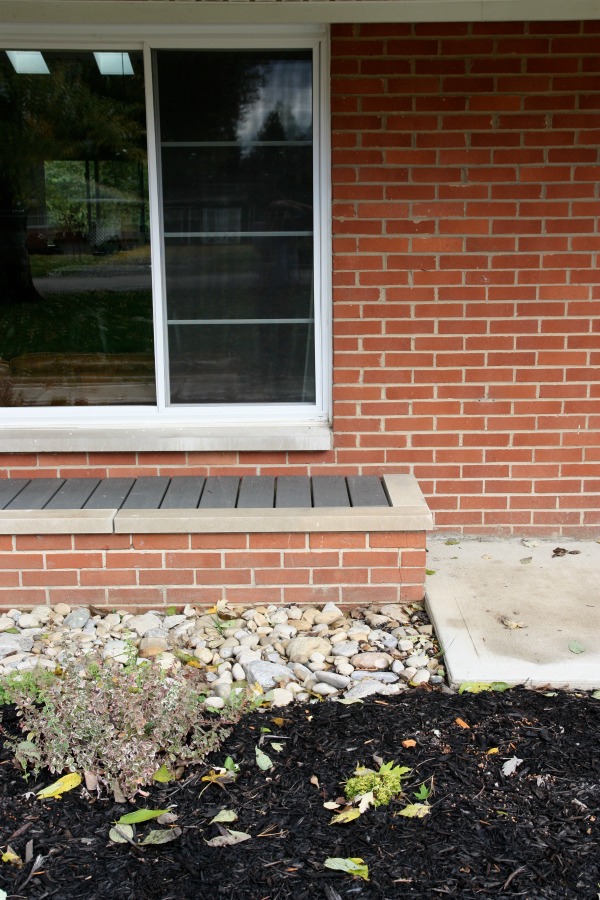
You may have noticed in the earlier wide shot that we turned the planter into a bench / covered storage. HH used leftover material from the deck to make a slatted seat / lid. It’s divided into three sections so we can lift it up and out. Waste not, want not.
Let’s take a look at the door from the inside, shall we?
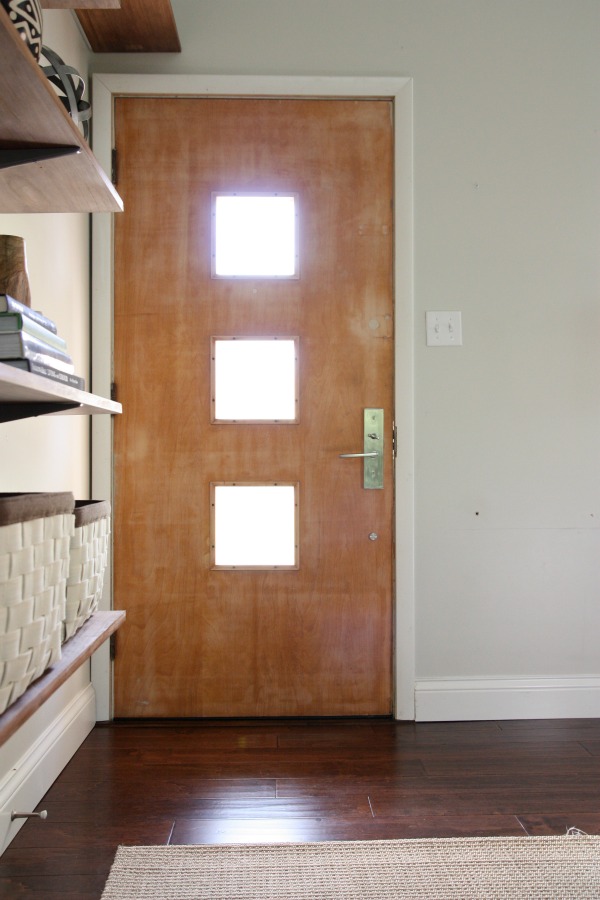
No gap at the bottom! If you look closely, you can see where the previous deadbolt and latch once lived. We kept the original hinges because they are heavy duty and work just fine.
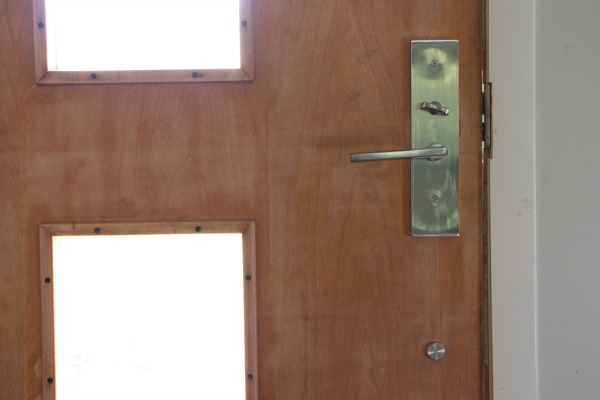
This side of the entry set has a simple lever which I love.
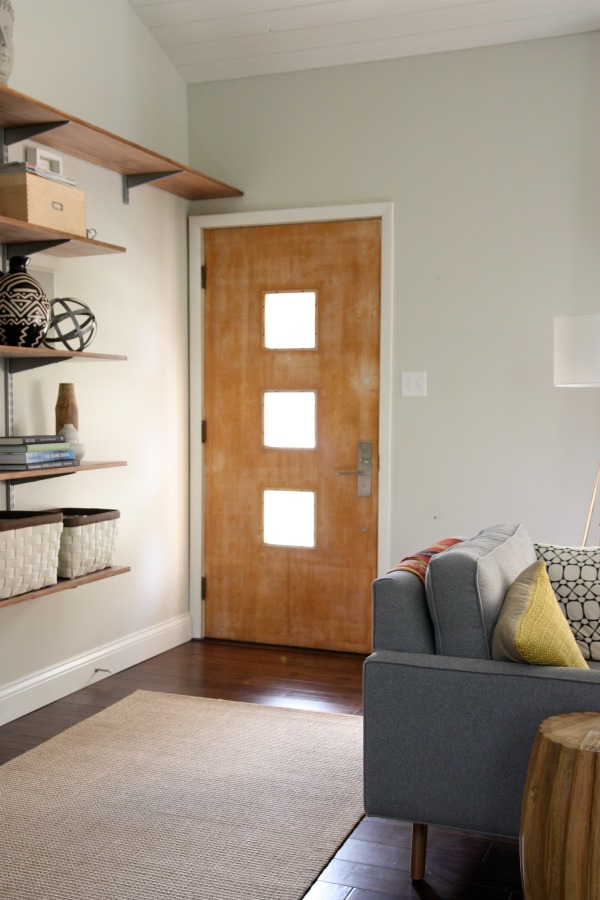
The trio of windows lets light pour into this otherwise dark corner of the great room. While I don’t dislike the idea of a stained or colored door on the inside, I think this side will go white. This corner is really small and dreary and think it would look best if the door faded away. However, I cannot wait to open the door on nice days and have the yellow exterior side make a happy appearance indoors. But seeing as how it’s already November {what?!}, I’m going to have to wait. Or maybe just open it for a minute to take a picture.
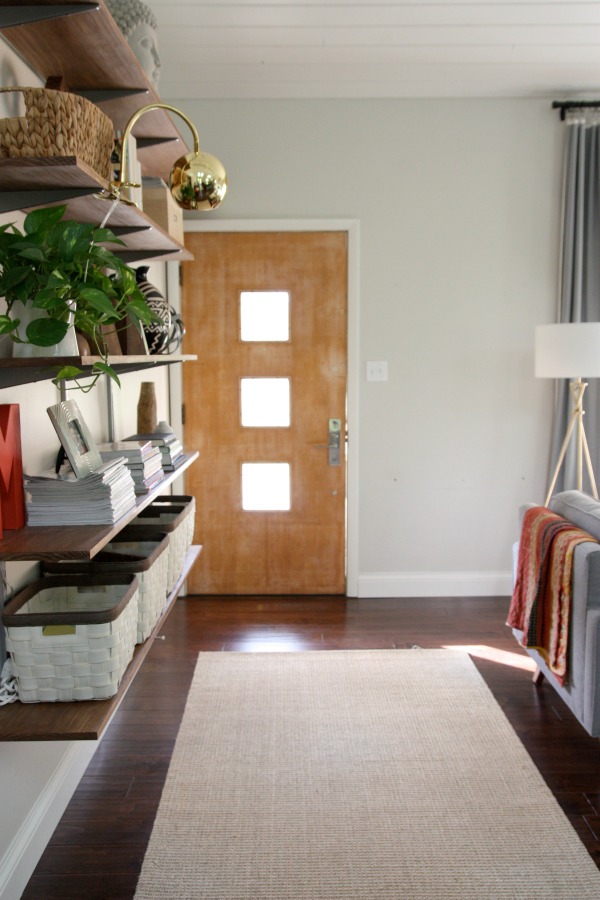
What do you think? Are you glad we salvaged the front door? Do you think we should consider different paint options? How was your Halloween?
FYI – Once I have true afters, I will post all source info in one meaty post.
P.S. – As hard as I try, I can’t like pumpkin. So I made these with the kids instead.
images: Dana Miller for House*Tweaking
How exciting is that post title? It just grabs your attention and pulls you in, right? Haha.
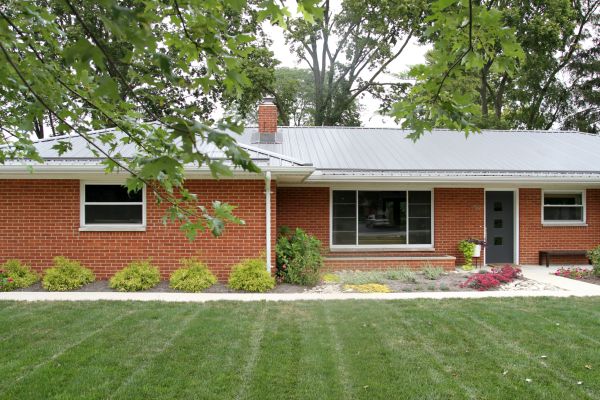
I like a good renovation as much as the next house-loving person. But I have to say it’s been nice living in a post-renovation home. We’re able to make it through entire weekends with no dust flying, no rooms off limits, no major disruptions. It feels like we’re finally living in our house. Maybe that doesn’t make sense but, if you’ve ever lived through a major remodel, maybe it does.
When/if we get the itch to DIY, we have several little projects still on the to-do list. This summer we crossed off a few of those things and even tackled some projects that weren’t on the list. We built screens to disguise the trash and recycling bins and the electric meter. (So far, we haven’t received any hate mail from the meter reader.) We also added a refrigerator side panel and organized the garage. I haven’t written about the garage yet, but we parked a vehicle in it for the first time ever! #postrenovationgoals
Today I’m sharing a few more outdoor projects we worked on this summer. They aren’t really post-worthy as stand alone projects so I’m lumping them together in one meaty post.
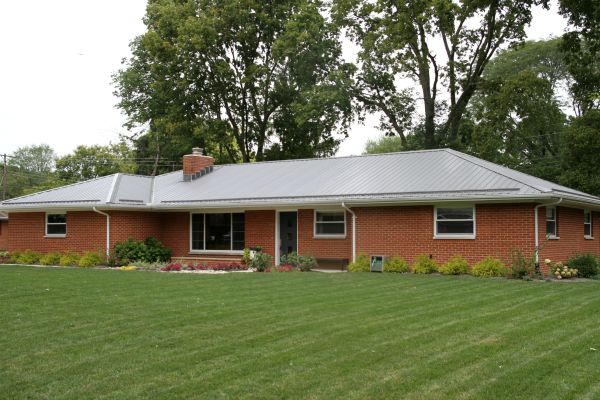
We added snow rails to the metal roof. (And by we, I mean Steve.) You may recall that we originally installed clear plastic snow guards on the roof above the exterior man doors and garage door. (You can spy them here and in most of the exterior shots of the house.) They were *supposed to* prevent snow and ice from avalanching off the metal roof in the winter to protect our gutters and any humans on the ground. But after our first heavy snowfall two years ago, the guards over the front door slid right off with the snow. (!) It wasn’t exactly the protection we were hoping for. We think their failure had everything to do with the pitch – or lack thereof – of our roof.
The good news is we found a local company that was able to manufacture snow rails for us. The bad news is it took TWO YEARS to finally get the snow rails in our hands. (For the company’s sake, I’m not naming them publicly. While their product is excellent, we can’t vouch for their customer service.) The snow rails were color-matched to our existing roof and set us back $500. Steve easily tapped off the plastic snow guards with a rubber mallet. Then he cut sections of the snow rail to length and screwed them into the metal roof ribs with stainless steel screws. (The ribs are the raised “lines” on the roof.) The screws are rustproof and boast rubber washers. The major stipulation was that each continuous length of rail had to end on a rib. You can see how each rail ends on a rib in the photos above and below.
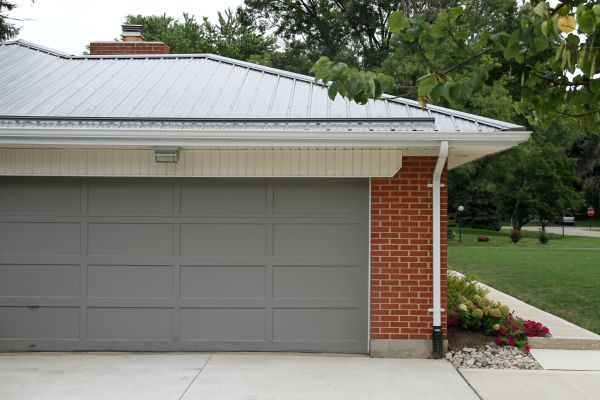
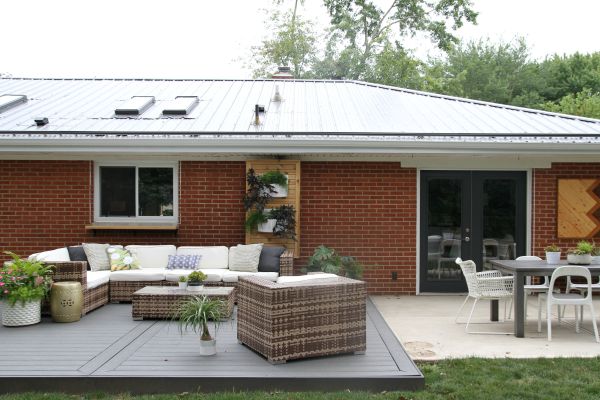
The rail extends around the entire perimeter of the roof – front, sides and back. With help from his dad, Steve knocked out the job in two hours. We actually love the aesthetic of the snow rails and we’re glad to have the rails in place before winter hits. Of course, this means we’ll probably get no snow this year. So be it!
$500 plus two hours of DIY labor isn’t the end of the world but if you’re considering metal for a low-pitched roof in a colder climate, it’s just something to keep in mind. Learn from our mistakes, people. We’re your guinea pigs ;)
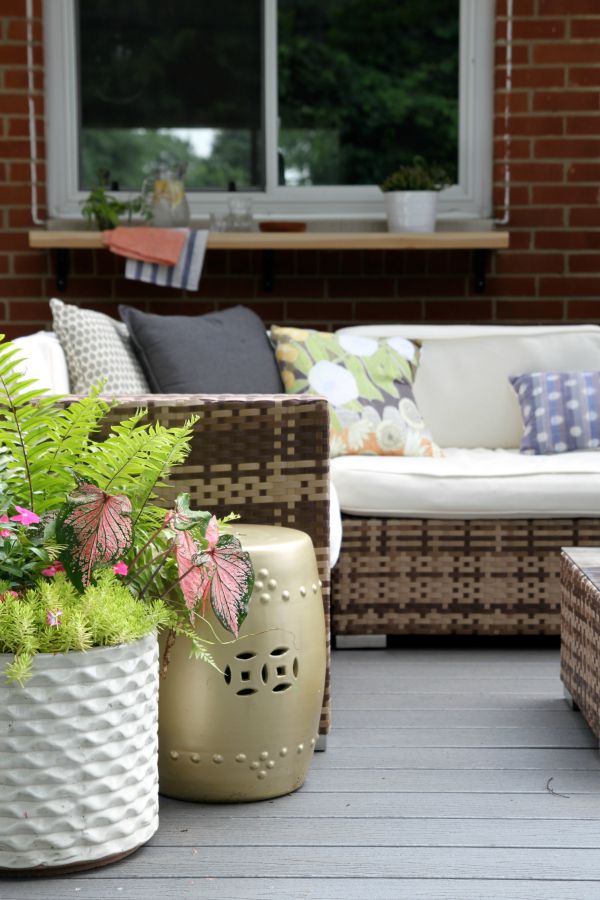
We made an outdoor shelf for the kitchen window. (And by we, I mean I told Steve what I wanted it to look like and he built it.) I’ve always thought the window needed a shelf to better connect it to the deck area.
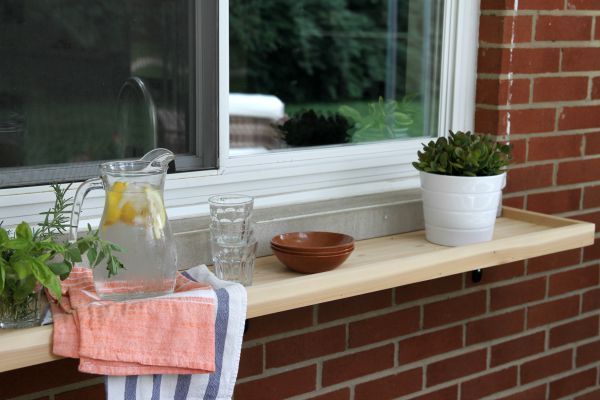
The shelf is constructed of cedar boards and off-the-shelf exterior brackets – both from Menards. The brackets are screwed into the brick facade with Red Head wall anchors. FYI – Red Head refers to the type of screw, not the color ;) Steve added a lip of trim with nails and wood glue. I like that the lip provides a little security for loose items.
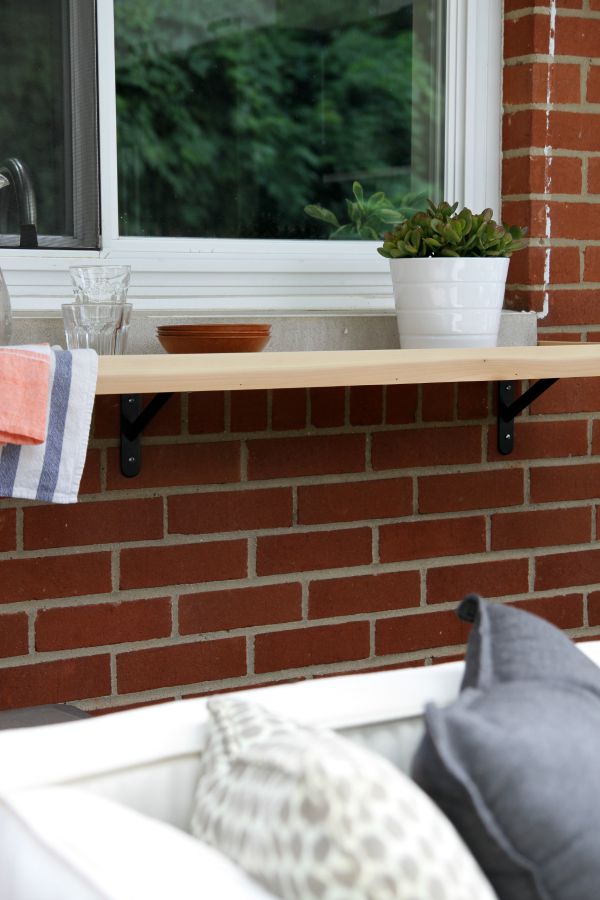
The shelf is a great spot for drinks, napkins and dessert plates when we eat outside. We purposely didn’t make it deep enough for dinner plates because it’s not really conducive to acting as a pass-through… which would have been a cool idea but not practical. The kitchen sink is just inside the window but it’s difficult to access the shelf through the window.
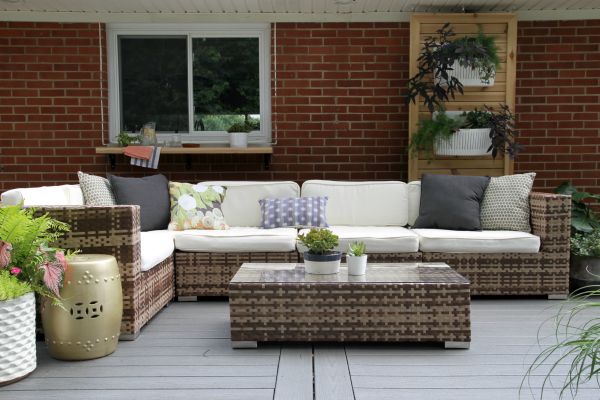
While I’m thinking of it, many of you want to know how the outdoor furniture is holding up. The plastic wicker-like bases are in mint condition. No breakage, no fading, no rust. Covering them in a high quality cover during the winter helps immensely. (See how we store the outdoor furniture here.)
The cushions are a bit more needy. They aren’t meant to be left out all the time. I only place them on the sectional when we’re using it. In the summer, I stash the cushions behind the sectional under the deep eave for added protection from the elements. In the winter, I store them in the attic. The covers are machine washable and I wash them each fall before stashing them away for the winter. They’re in pretty good condition. The zippers still work. There aren’t any tears or holes. There is a spot on one cover where a pile of dead leaves left a stain. The cushions are reversible so I just turn that side down. I line dry the covers after washing but there has been some shrinkage. They still fit the cushions but you can see how the piping doesn’t line up perfectly now. It’s not a deal breaker but, again, something to keep in mind.
Also, those Woolly Pockets are the bomb. I love them.
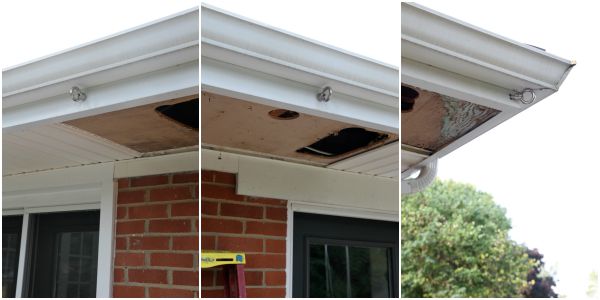
We added hardware for future shade sails. Adding shade sails above the deck and dining patio has been on our wish list for a while. A few readers suggested checking out Costco for affordable options. Thank you! We did give them a look but we really feel like our space would benefit most from custom sails. We’ve determined a larger rectangular sail over the deck and a smaller triangular sail over the dining patio is the ideal setup for us. Because of ongoing insurance quandaries resulting from Everett’s accident earlier this year, we don’t feel comfortable shelling out money for the actual sails this year.
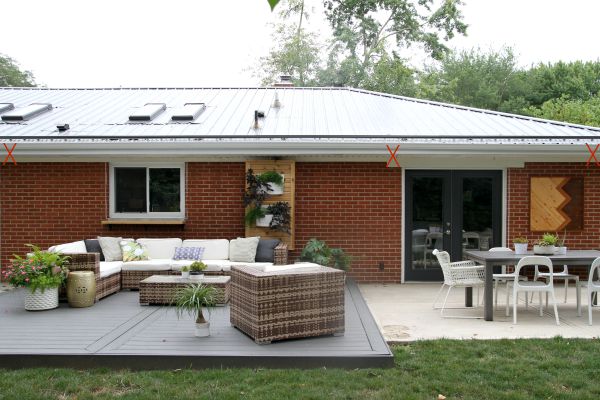
Instead, we purchased and installed the hardware (basically a trio of heavy duty rings) along the eave and have loose plans to put in a trio of posts in the yard this fall. (I marked out the general locations of the rings in the photo above with red X’s.) We’re hoping to add the sails next summer. I’ll keep you posted. Sometimes, this is how bigger projects go. We piecemeal them into smaller projects as time and money allow.
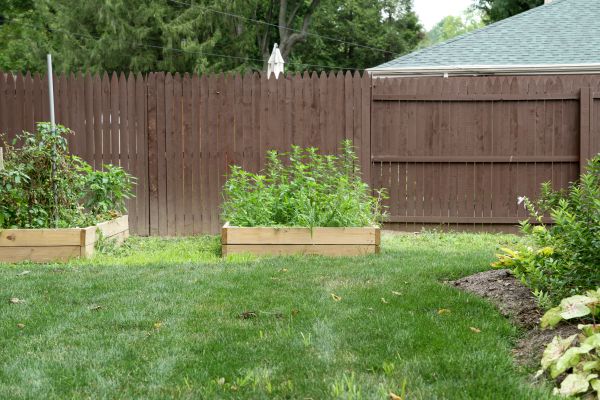
We put in two garden beds. I wish the picture better portrayed how much joy this project has brought to our lives. I also wish our neighbor’s fence was charcoal or black.
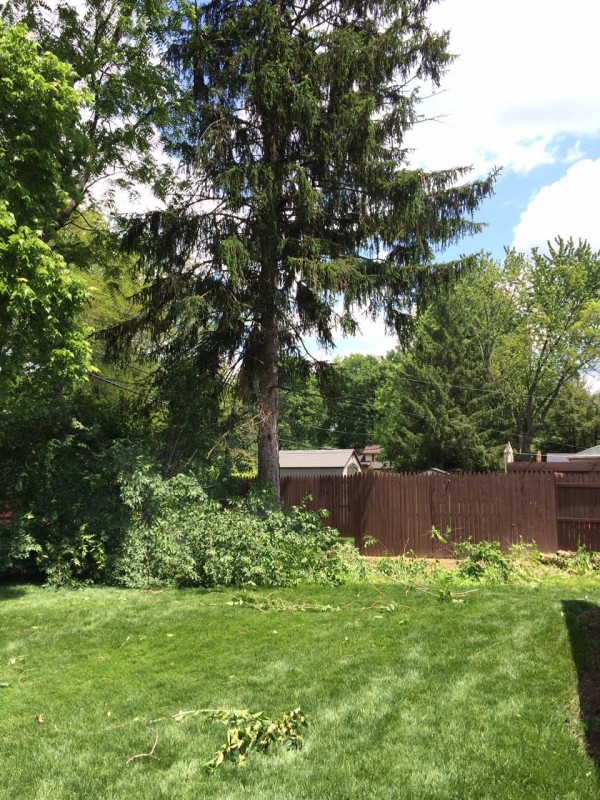
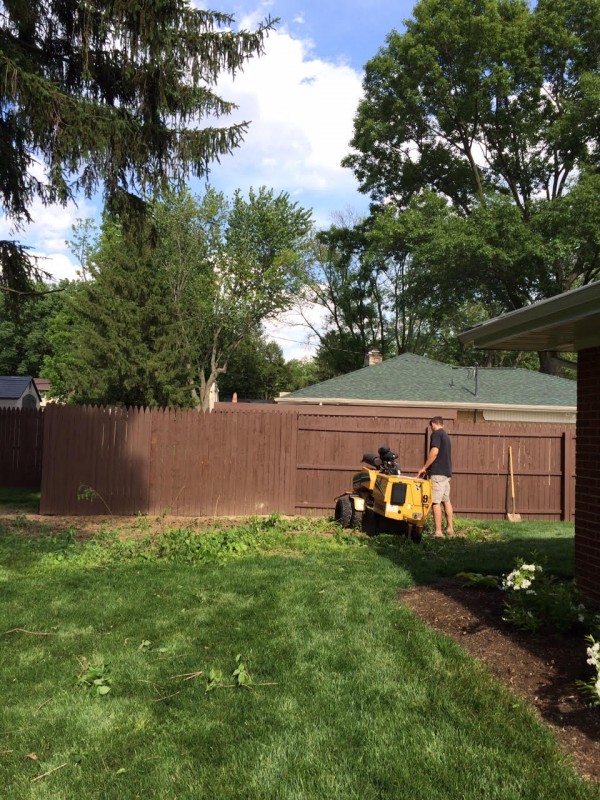
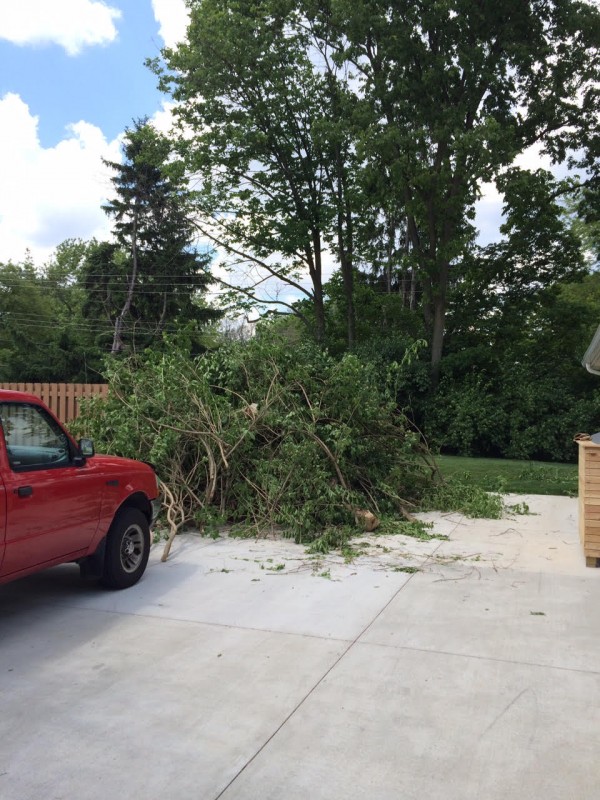
One side of our backyard was overgrown with LARGE random shrubs. We cleared them out earlier this summer with the help of a chainsaw and a rented stump grinder and paid a tree trimming crew to come out, mulch everything and haul it off. That brush pile was three times bigger when it was all said and done. Then we made two basic 4′ x 8′ raised garden beds. We had rich soil + organic compost delivered to fill the beds. Layne had grown a few hot pepper and cucumber plants from seed at school last spring so we plopped those in one of the beds and let nature do its thing.
Clearing out the space for the beds opened up our backyard to a neighbor’s backyard. His name is Bassim. He’s Lebanese and the sweetest person. As soon as he saw we were attempting to grow a garden, he offered up two tomato plants from his garden that weren’t doing so well. He thought they would fare better in our raised beds. Plus, he’s just really nice. The tomato plants took well to the transplant. We had a decent first harvest: first cucumbers, then tomatoes and now hot peppers. I have no idea what we did right but we’re so into this gardening thing now.
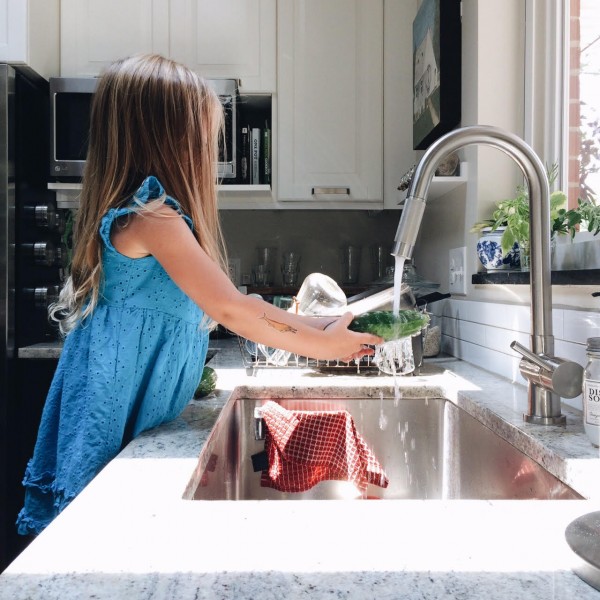
The kids LOVE going out and checking the garden everyday. They pull weeds and pick whatever is ripe. They bring in their mini harvests and wash it all by hand. The cucumbers usually don’t make it to the fridge. The kids eat them fresh of the vine. I’ve been making all of my favorite tomato recipes including this one. Bassim lets me clip fresh basil from his garden. It’s so good as a garnish.
Everything you’ve heard about growing your own food is true. It’s opens you up to whole new community. Okay, maybe one neighbor isn’t an entire community but still. When Bassim sees us outside weeding, watering or harvesting, he comes over to say hi and talk garden talk. And seeing the kids’ sense of pride and excitement in growing, picking and eating their own food is priceless. It’s something I want to continue to nurture.
The second bed is growing impressive weeds. Cue the womp, womp sound effect. We didn’t plant anything in it because we wanted to see how the first summer went with one bed. I thought about making it a cutting garden so I could grow flowers to bring inside for decoration, but our family has enjoyed growing food so much that I think we’ll plant more veggies next year. Suggestions?
That pretty much brings you up to speed on outdoor projects around here. Have you crossed off any outdoor projects on your to-do list this summer?
images: Dana Miller for House*Tweaking


budget decor, DIY, renovation